Culling of Geometry
Introduction.
When drawing large scenes you will quickly run into performance issues. We can improve the performance by rendering only polygons that are visible to us. This is called Culling
There are three types of culling, Frustum Culling, Back/Frontface Culling and Occlusion Culling
Frustum Culling.
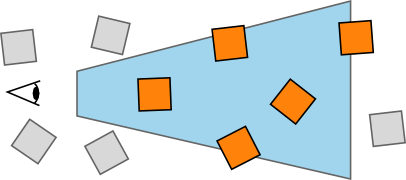
When using frustum culling the renderer will only draw objects inside the viewing frustum. The viewing frstumm is a geometric representation of the area visible to the camera. This can be done by a simple AABB check. But it is possible for objects to be partially visible. These objects are cut into pieces in a process called clipping. Pieces that are outside the frustum are discarded.
Back/Frontface culling
When drawing 3D objects there is always a part of the object that is obscured by the front face. This part is called the backface and obviously does not need to be drawn. The backfaces are determined by the vertrex winding order. A side effect is that when your camera is inside a object it will appear as transparant. To prevent this you can either disable culling entrily or cull the front face if you only need to see the inside. This is the case with skybox’s. Back/Frontface culling is handled by most graphics API’s.
Keep in mind this proccess does not take other objects into account. We need Occlusion Culling to do that.

Vertex Winding Order
When the command queue is executed the vertices processed by the rendering pipeline are processed in the order provided by the Vertex Specification. When vertices are broken down into primitives the order of the vertices relative to the others in the primitive is noted. The order of the vertices in a triangle when combined with their visual orientation can be used to dermine whether the triangle is being seen from the front or back side.
Contribution culling.
Probably the simplest type of culling. When a object it is so far away it only appears as a single object on your screen there is no reason to draw it so we dont’t. Or if a object is to close to the camera we do not always want to draw it. This is done via the clipping plane.
Occlusion Culling
Objects that are obscured by other objects may need to be culled. This technique has probably the monst impact on your application. But not always the impact you want. If you have little geometry or are positioned in such a way nothing is getting culled it only decreases performance. Therefore Occlusion Culling should only be used in large scenes with lots of objects obscuring eachother. There are serveral approaces to this technique:
- Occlusion Query Devides the scene into chunks and pre-computes visibility for them. These sets are indexed at run-time to determine what objects are obscured quickly. This is supported by most modern GPU’s.
- Early-z Rejection Early-z compares the depth value of a fragment to be rendered against the value currently stored in the z-buffer in the rasterizer stage. If the fragment is not visible rejection occurs without fetching the texture for the fragment or executing the fragment program.
Early-z rejection
There is a big difference between occlusion query and early-z rejection. Occlusion query rejects polygons whereas early-z occurs at the rasterization level. Occlusion query also requires more control from the application.
Both Early-z rejection and occlusion query reqiore the objects to be sorted from front to back. Early-z rejection is easy to implement since the GPU will take care of the rest. Occlusion query take more work tough…
Occlusion Query
OpenGL has the ARB_occlusion_query extension which implements the occlusion query idea on the GPU and fetches the query results. Microsoft incorporated the same functionality in Direct3D 9
An occlusion query is fundemantally simpel. The GPU tells us how many pixels should have ended up visible on-screen. These pixels successfully passed various tests at the end of the pipeline such as the frustum visibility test, the scissor test, the alpha test, the stencil test and the depth test.
Here is how to process works:
- Create a query.
- Disable rendering to screen (set the color mask of all channels to False).
- Disable writing to depth buffer (just test against, but don’t update, the depth buffer).
- Issue query begin (which resets the counter of visible pixels).
- “Render” the object’s bounding box (it’ll only do depth testing; pixels that pass depth testing will not be rendered on-screen because rendering and depth writing were disabled).
- End query (stop counting visible pixels).
- Enable rendering to screen.
- Enable depth writing (if required).
- Get query result (the number of “visible” pixels).
- If the number of visible pixels is greater than 0 (or some threshold), Render the complete object.